Upload programs to an Arduino with your Mac in 4 steps
This tutorial is a starting point for programming Arduino boards on your Mac. It shows how to install the software and to upload your first program to an Arduino board.
Arduino is an open-source electronics platform based on easy-to-use hardware and software. It’s intended for anyone making interactive projects. The Arduino hardare is based on the AVR microcontroller family of Atmel and programming these microcontroller uses the STK-500 protocol of Atmel. The STK-500 protocol was originally designed for a serial rs-232 connection, nowadays, a USB to serial converter is used to provide a direct connection with your PC. In case of Arduino clones, most times an alternative chip as CH340 is used instead of the FTDI device.
Prerequisites
Before you can use your Arduino board with your Mac, you need to install the following packages:
Working Arduino suite: Installation tutorial and download;
USB to Serial driver - Installation tutorial driver and download (PL2303 and CH340/1 and HL340).
Step 1 - Open Serial Example Project
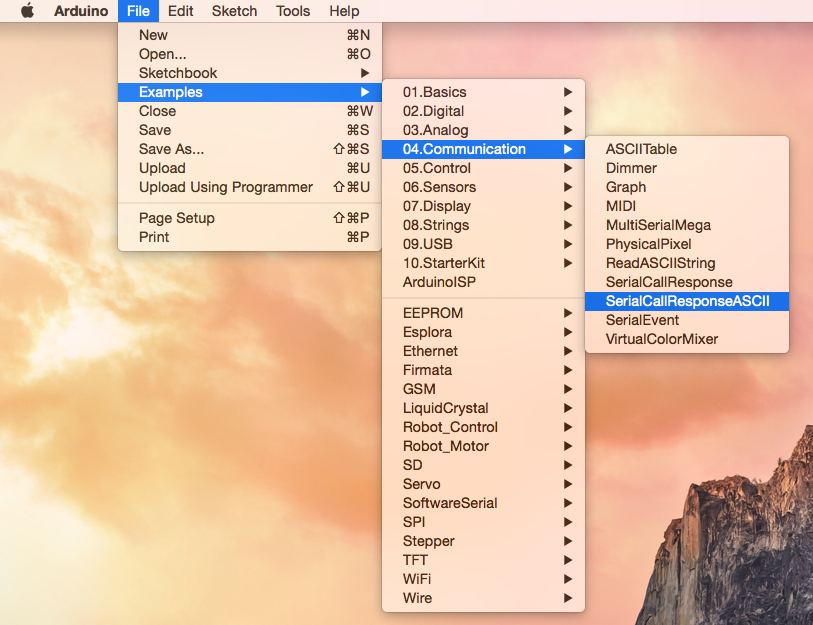
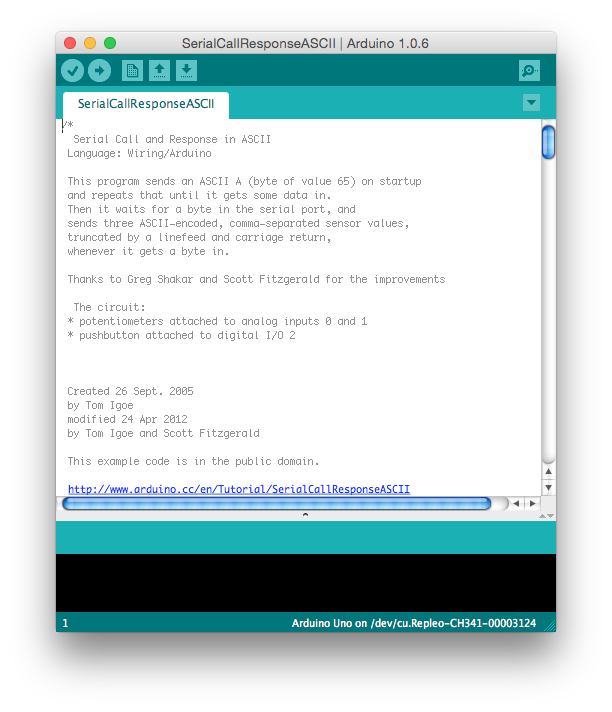
Start the Arduino suite, when it is finished open a serial example project via the File menu. This tutorial uses SerialCallResponseASCII.
Step 2 - Connect the Arduino Board
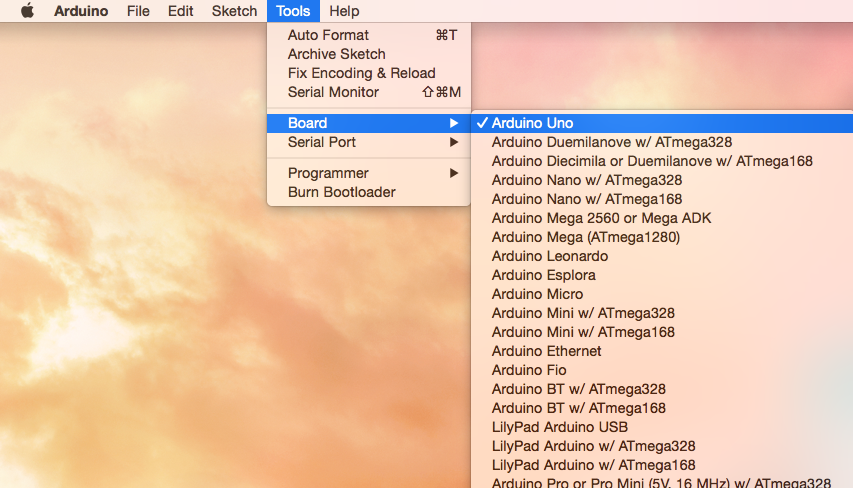
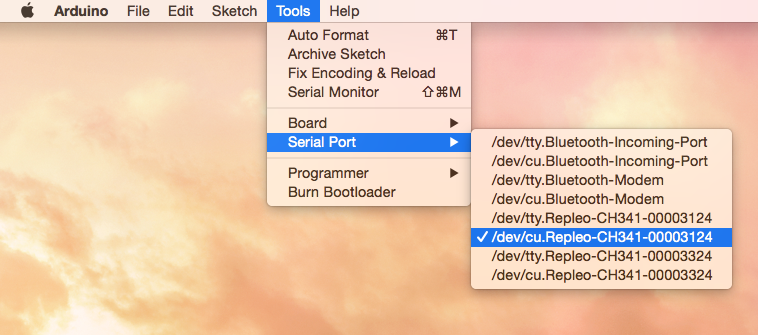
Before you can upload a program to your Arduino Board you need to configure the suite for the board. First select the correct board:
Step 3 - Program the Arduino Board
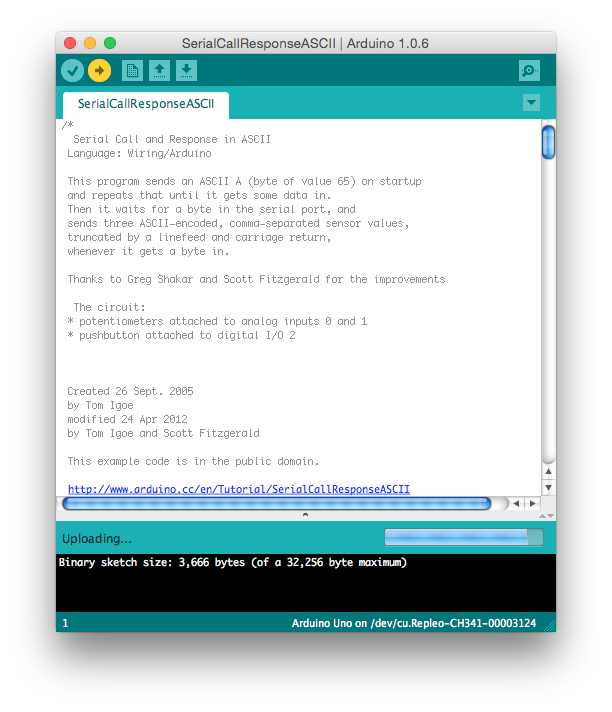
You are now ready to upload the program to your Arduino. Press the upload button in the editor, you can recognize it by the arrow pointing to right. After pressing this button, the console window shows the compilation process and finally the upload process.
Step 4 - Ready
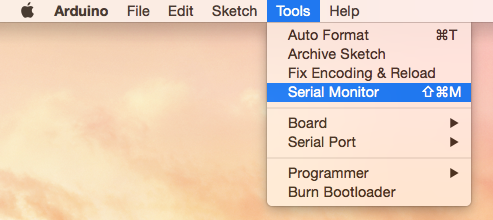
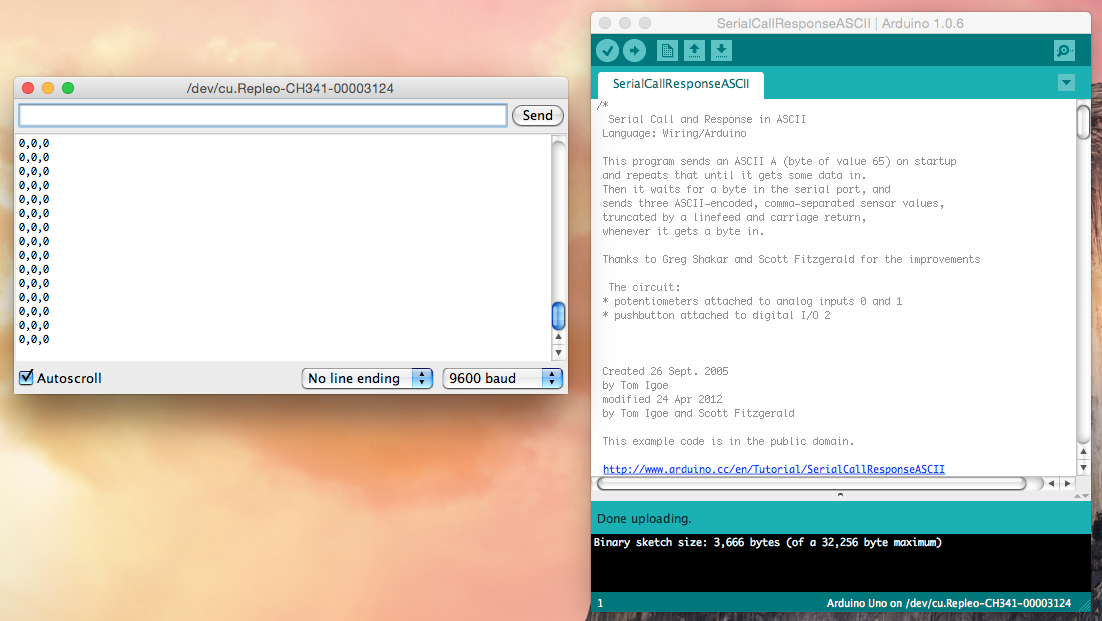
Your are finished, and the Arduino has been programmed. The program you uploaded continuously transmit data from its serial port. If you open the serial monitor, you see it transmits every couple of seconds 0,0,0, when you send a character to the device, it answers with three values.
